Hi!
On Thursday morning during first period, my friend and I were sitting in French class when the announcements came on. Generally, I don't listen closely to the announcements, but this one in particular caught my attention. Apparently, there has been a movement around the school to make a Quidditch team!
My friend and I have been Harry Potter fanatics since about fourth or fifth grade, so naturally we were both excited. Later, we went on the school website where it describes how to play Muggle Quidditch.
Essentially, it's people running around, trying to get a ball (the Quaffle) through one of three hoops. There's the golden snitch, which is played by one person running around the field, trying not to get caught by either team's Seeker.
There are seven players on the traditional Quidditch team. Firstly, you have the seeker, whose only job is to catch the golden snitch. Then there's the keeper, who tries to stop the Quaffle from going into either of their team's hoops. There are three chasers, who generally try to get the Quaffle through the other team's hoops, and two beaters. Beaters try to stop the bludgers (two stone balls that try to knock players on either team off of their brooms) from harming their team. The bludgers probably wouldn't be allowed, nonmagical or not, because it is probably a liability.
Either way, I know that if the sport/club is approved, I'll be ready to sign up this spring!
~Sara
Friday, January 25, 2013
Sunday, January 20, 2013
I Have Returned...
Hello!
So over the last week, I've been trying to think of things that I can post on here while I'm working on another project that isn't done yet, but I haven't come up with much...
Instead of a craft tutorial or whatever, I decided to finally post the skating show pictures! I don't know if you really care or not, but here they are anyway!
 So that is the beginning of a layback spin, which is where you lean back and look at the ceiling with your leg arched behind.
 ...And a spiral...
 And one final one as I go into a footwork sequence.
I hope you liked this brief update! Hopefully, I'll add something more exciting tomorrow.
~Sara
So over the last week, I've been trying to think of things that I can post on here while I'm working on another project that isn't done yet, but I haven't come up with much...
Instead of a craft tutorial or whatever, I decided to finally post the skating show pictures! I don't know if you really care or not, but here they are anyway!


I hope you liked this brief update! Hopefully, I'll add something more exciting tomorrow.
~Sara
Sunday, January 13, 2013
More T-Shirts!
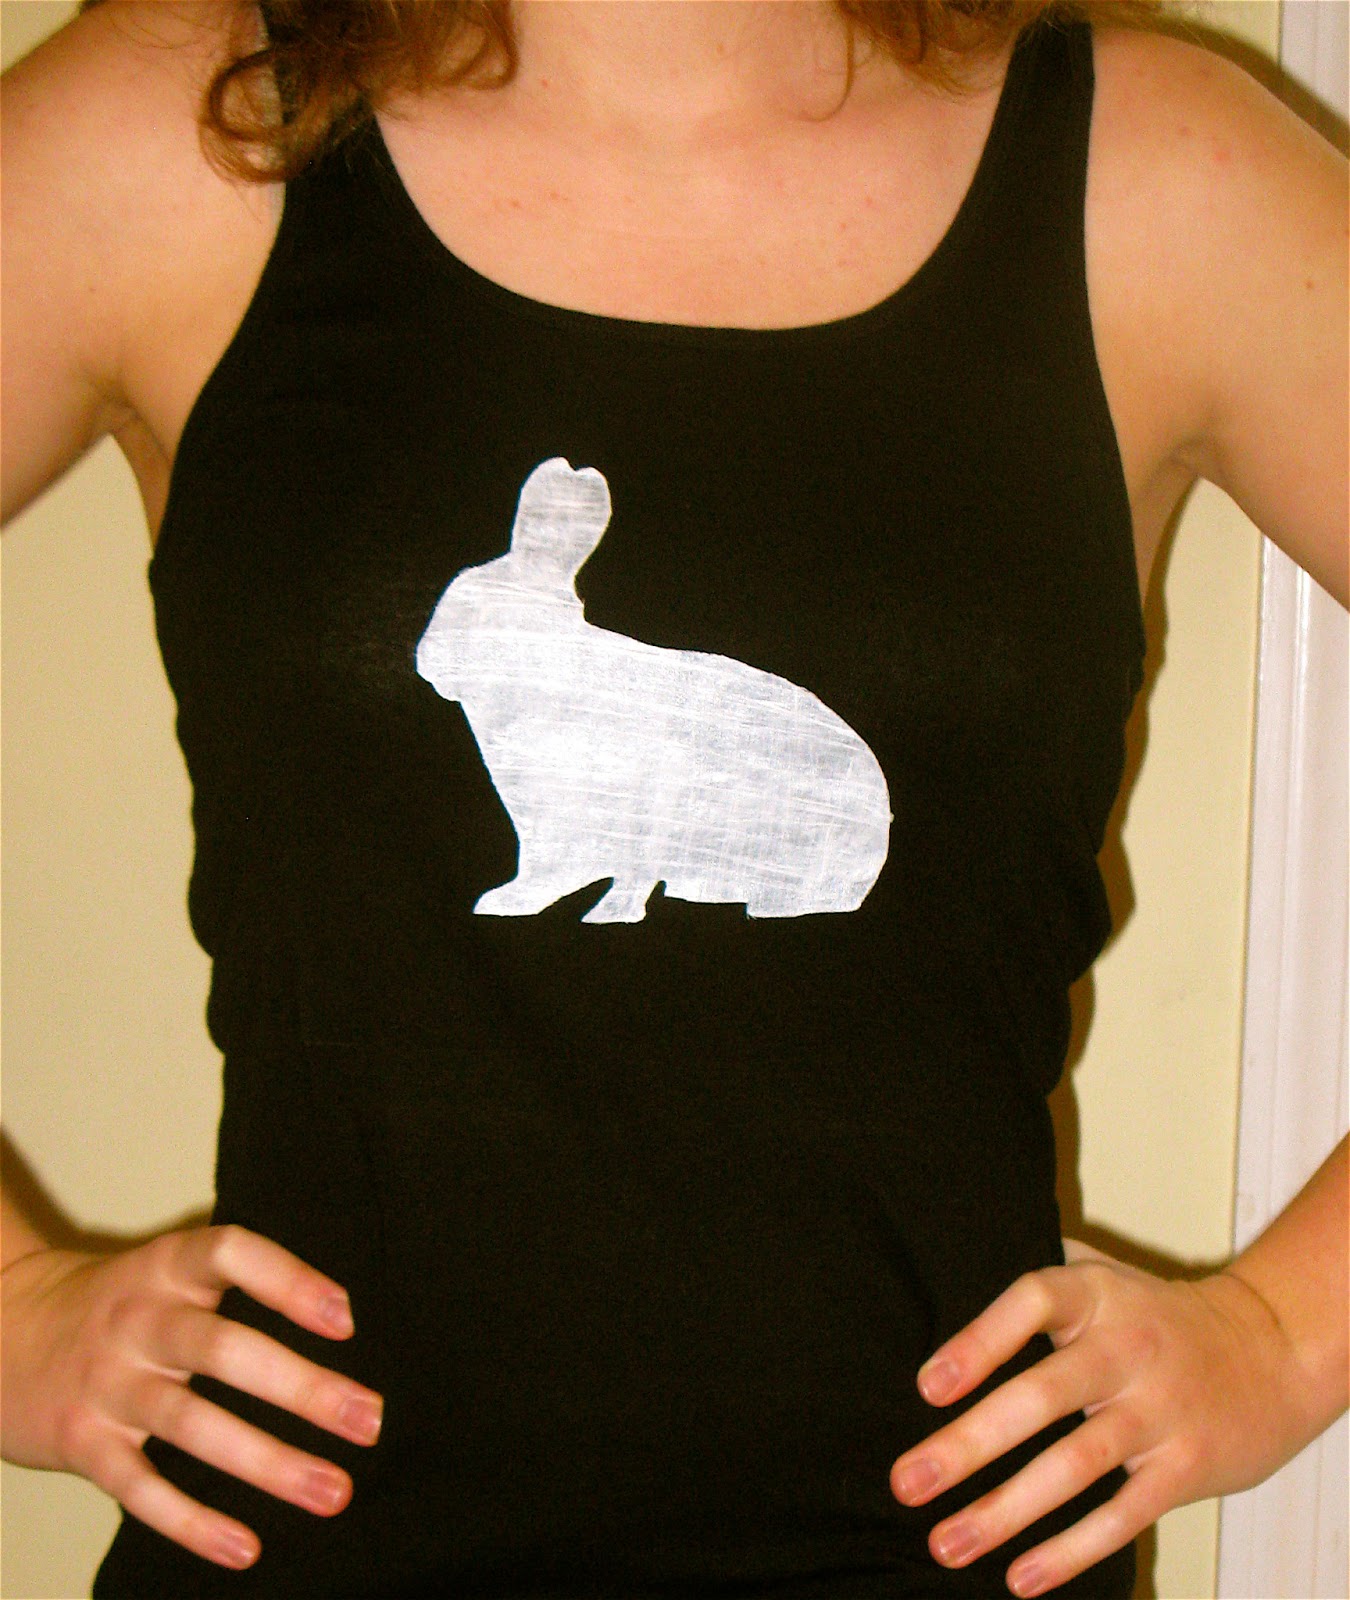
So here's the rabbit one I said I would post:
 It's by far the easiest, because you only have one silhouette to work with. However, what I wouldn't recommend is putting a light color over a dark shirt. You can sort of see the stripes that happened on mine...
And now here's another Sherlock one, because I can:
 I'm quite proud of this one, because I had to slice the miniscule lines around the scarf, but I'm so happy it worked out!
I might post another clothing tutorial today if I can, so stay tuned!
~Sara
And now here's another Sherlock one, because I can:

I might post another clothing tutorial today if I can, so stay tuned!
~Sara
Saturday, January 12, 2013
Freezer Paper T-Shirt
Today, I told myself I would do all of my homework. I didn't.
Instead, I made awesome t-shirt art!
So, we all know that I'm obsessed with Sherlock, right? Good. I've been wanting to get a t-shirt to further express my love for the show (don't judge me), but I couldn't find any that were to my liking, so I made my own!
(At this point I would like to give all credit for the idea to the illustrious Fiona, who can be found on her blog here: http://thebluejumper.blogspot.com/)
You will need: Fabric paint, an iron, freezer paper, printout or drawing of your image, X-acto knife, and a piece of fabric you want to use.
Want to try? Here's how:
So, I looked online for a good (translation: easy) picture of Sherlock that I liked and I found the one that is most commonly used in the I Believe in Sherlock movement. Here's the printout I used:
 Then I sliced it up and ironed it on.
 Then I painted it...
 (Sherlock, you've got something on your face...)
...and we wait for several hours...
Ta-Da!

 (I know, it's me! I really do exist!)
You have no idea how proud I'm feeling right now :D. Well, not because I exist, though that is a feat in and of itself, but because of the shirt, obviously.
So I hope you like it and have a great weekend!
~Sara
P.S. I'm making a rabbit one right now, so I'll post that at some point, probably later tonight.
Instead, I made awesome t-shirt art!
So, we all know that I'm obsessed with Sherlock, right? Good. I've been wanting to get a t-shirt to further express my love for the show (don't judge me), but I couldn't find any that were to my liking, so I made my own!
(At this point I would like to give all credit for the idea to the illustrious Fiona, who can be found on her blog here: http://thebluejumper.blogspot.com/)
You will need: Fabric paint, an iron, freezer paper, printout or drawing of your image, X-acto knife, and a piece of fabric you want to use.
Want to try? Here's how:
- Tape your printout over a piece of freezer paper and put on a cutting board or work surface. Slice along the outlines and remove the parts that you want to show in paint.
- Iron the freezer paper (shiny side down) in your article of clothing or fabric (I'll call it a shirt from here on in because that's what I used). It should stick to your shirt.
- Put some newspaper between the layers of your shirt and paint the fabric paint in the negative spaces and allow to dry for the time specified on the bottle of paint. Mine took 4 hours.
- Carefully peel up the freezer paper and admire your handiwork.
- Now, you have to wait at least overnight before you can wash it, and then you can wear it! I can't wait for Monday so I can wear it to school! YAY!
So, I looked online for a good (translation: easy) picture of Sherlock that I liked and I found the one that is most commonly used in the I Believe in Sherlock movement. Here's the printout I used:


...and we wait for several hours...
Ta-Da!


You have no idea how proud I'm feeling right now :D. Well, not because I exist, though that is a feat in and of itself, but because of the shirt, obviously.
So I hope you like it and have a great weekend!
~Sara
P.S. I'm making a rabbit one right now, so I'll post that at some point, probably later tonight.
Cutout Book: Finished!
I've just finished my hollow book and I'd like to see what you think! Now, let's see, where were we?
So you've just begun cutting out the beginning of the book, correct? Well, now you get to continue that step for a looong time, until you hit the back of the book. When you begin to get close to the back, I would recommend putting a thin cutting board between the last page and the back cover. I didn't do that until I realized that I had actually sliced through the back a little bit :)

Now you should have a cover, 1-3 pages in front, a whole lot of pages with no middle, and a back cover. Here's what you need to do now:
Use your glue mixture to coat the back of the block of cutout pages and press it to the back cover. Next, do the same, but for the front and those extra pages in front.
Now, you get to wait again! Pile books on top and let the glue dry once more.
Open your book. You should have a cover and then 1-3 pages that are glued to the rest, making it look like an ordinary book (sort of). Take your X-acto knife and carefully cut the front pages to the same size as the rest. The only real purpose this serves is so that you don't see the pencil lines you drew before.
You're done! Now, nobody will suspect a thing...
 I hope you enjoyed it!
~Sara
So you've just begun cutting out the beginning of the book, correct? Well, now you get to continue that step for a looong time, until you hit the back of the book. When you begin to get close to the back, I would recommend putting a thin cutting board between the last page and the back cover. I didn't do that until I realized that I had actually sliced through the back a little bit :)

Now you should have a cover, 1-3 pages in front, a whole lot of pages with no middle, and a back cover. Here's what you need to do now:
Use your glue mixture to coat the back of the block of cutout pages and press it to the back cover. Next, do the same, but for the front and those extra pages in front.
Now, you get to wait again! Pile books on top and let the glue dry once more.
Open your book. You should have a cover and then 1-3 pages that are glued to the rest, making it look like an ordinary book (sort of). Take your X-acto knife and carefully cut the front pages to the same size as the rest. The only real purpose this serves is so that you don't see the pencil lines you drew before.
You're done! Now, nobody will suspect a thing...

~Sara
Thursday, January 10, 2013
Trivial Pursuit is Stalking Me
This is really unrelated, but also really funny!
So today, my friend Fiona and I were having a Trivial Pursuit marathon/competition on my iPad. My head is full of completely random facts, so I think that Trivial Pursuit is really fun! On our second game, I got this prompt:
"Hedgehogs are not indigenous to these two continents." (The answer was Australia and North America) I got it wrong, so it was Fiona's turn...
Her question was:
"Which actor played Arthur Dent in The Hitchhiker's Guide to the Galaxy?"
And the answer was... (drum roll, please!) Martin Freeman, ladies and gentlemen.
Coincidence? I think not!
If that made almost no sense to you, never fear, because I will explain! Apparently, Martin Freeman (who played John Watson in Sherlock) is often referred to as a hedgehog. I don't know why, but if you Google it, you'll get comparison pictures between the actor and the animal.
That's just my little interlude for the day. I'll post pictures of my nearly-finished hollow book tomorrow or some time over the weekend.
See you soon!
~Sara
Sherlock quote for the day:
"Ordinary people fill their heads with all sorts of rubbish, and that makes it hard to get at the stuff that matters, do you see?" -Sherlock Holmes, in The Great Game
[Sorry if it's not verbatim, but I wrote it from memory :) ]
* * *
Tuesday, January 8, 2013
Work-In-Progress: Cutout Book
Hello!
Yesterday, I embarked on the illustrious Adventure of the Cutout Book (or, more accurately, I thought, I'm bored, and I'm not doing anything productive...). If you'd like to try it, here's what you'll need:
Let's begin, shall we?

 (But don't worry, I'm at least to Volume 2!)
I'll update soon!
~Sara
Yesterday, I embarked on the illustrious Adventure of the Cutout Book (or, more accurately, I thought, I'm bored, and I'm not doing anything productive...). If you'd like to try it, here's what you'll need:
- One relatively thick hardcover book (I used an annotated version of Pride and Prejudice)
- A ruler, preferably metal
- A pencil
- Glue-and-water mixture, about half glue, half water
- X-acto (?) knife
- A thinner blade if you have one
Let's begin, shall we?

- Obtain a thick, hardcover book. You can probably find a dictionary that nobody uses anymore, or an old school textbook. You could even go to the library or used bookstore and ask of they have any for a good price. I think our library gives away obsolete books every year for free, so yours might too!
- Open the book to the second or third page and draw a 1 inch border around the outside in pencil. This will be the size of your box. You can see the border (barely) in the first photo.
- Paint the glue-and water mixture over the edges of the pages. Try to be neat; if you want to trick someone, it has to look authentic! Put a piece of plastic wrap or wax paper between the page you just drew on and its facing page to make sure that they don't get stuck to the others.
- Place several heavy books or weights on top of the book. I used textbooks: biology, physical science, math, and French. All of the weight makes the pages stick together and stops them from curling and warping. The glue should be dry about 30 minutes afterwards, but I let mine dry for two hours. You might want to repeat this step if any of the pages separate (and add more books the next time!).
- Now, it's time slice! Using your ruler, make the first few cuts very carefully. It will get easier when you're about fifty pages through :)
- This step takes forever and is quite messy. I recommend having a recycling bin handy for all of the pages and shavings. Also, I would not recommend wearing black, you'll get paper shreds and dust all over you!
- And now... we wait, because I haven't finished this step yet :)

I'll update soon!
~Sara
Tuesday, January 1, 2013
Fantastic! Meretricious! And a happy new year!
Hi!
I hope everyone had a great beginning to the new year. I know I did!
So yes, I know, I never did post my new Sherlock collages or my skating show movies. That's mostly because I was gone all day Sunday and Monday, but also because I forgot. I promise I'll post the Sherlock collages (I have four in progress now, and I had an idea for another) at some point. The skating show movie, however, has my face in it quite a lot, so I'd rather not post it :)
I will hopefully be updating again sometime today, because my friend is coming over and we've been talking about doing a blog-switch, so we'll see. Bye!
~Sara
P.S. The title is a reference to BBC's Sherlock (season 1, episode 3: The Great Game)
Subscribe to:
Posts (Atom)